|
Object Command Function
|   |
|
Object Command Function
| |
|
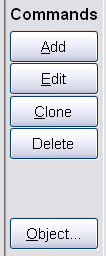
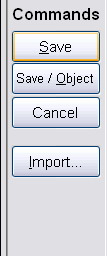
The Specification List's Object command (not the same as the "Objects" view command) allows you to use a specification as a component of an FF&E object, either an existing object or one you create as part of using this function. It is especially useful in creating smaller "sales order" type projects, by selecting products to use as components for each object, recording their specifications on the Specification Form, then adding them directly to the appropriate objects, all from the Specifications Screen. The command is the primary tool when entering data using a "spec-oriented method" for smaller sales order projects where managing the contents of full rooms not an issue. It appears on the main Specifications menu as well as when you are adding or editing a new specification when it appears as the Save / Object command:
When to use: We don't recommend this function as the primary approach in larger projects, because the first concern in these should ensuring that the list of items in each room is complete and the FF&E Worksheet's Add command is recommended for this (since it too can be used to create objects and specs as you use it). However, when a project has only one or two rooms or is a straight sales order in which a quote will list items in tag order, this is the best tool to use because it creates the object and places it in one step. When you select the Object function, you will see the Create/Modify Object form. To use it, first select whether you want to 1) create a new object with your specification or 2) modify an existing one. Creating a New Object Creating a new object is relatively straightforward; you only need to add or confirm a tag, a description (typically more generic than that used in the spec), select the class to which the object belongs and enter a unit of measure. You can also add an optional "Object Code" and a budget for the object ("budget" meaning for the finished piece as delivered). To make it easier to create new objects, most of the fields will prefill for you. Please note that the Object Code field is not the same as the Specification Code field, so if you are using codes on your specs, you do not have to enter the same code here. NOTE: If you have already created the object in which a spec is used, you don't have to use this option again. Unless you are substituting a spec for an existing component on the object (see "Modifying" below), any future changes you make to the spec fields will be reflected in all objects that already use that spec (product). All you need to do is select Save after editing the spec and entering the changes. Modifying an Existing Object The second option is to use the specification to modify an existing object. The choices here consist of 1) adding the spec to an object (either as the primary component if it has no component specifications yet, or as a supporting component) or 2) replacing an existing component (that is, replacing the product to be used). If you select this option, the first thing you need to do is select the object you want to modify from the drop-down pick list on the right side. Options Besides creating or modifying objects, you also have the option of placing the object in any existing room with a quantity. This makes this command a good choice for those who need to create specifications based on a list of items given to them—either a complete project or just a few miscellaneous items needed by a client. If the current project is of the "sales order" project type, this form will prefill with most of the fields needed to create an object with a Tag that matches the Spec ID of the current specification (unless that object Tag already exists). The form will also open with the cursor positioned on the "Room Qty" field so that, for most objects in a simple sales quote, you only need to enter the quantity needed and click "Okay". |
||||