|
The process of managing the production and shipment of products is done at three points in the use of FF&EZ:
- During the Design phase, before creating orders (problem prevention)
- Prior to issuing purchase orders (final adjustments)
- After issuing purchase orders (the fun begins)
Of these three, the phase that occurs after issuing orders is obviously the largest. We will touch on the first two prior to outlining the functions that you use for the main task of expediting.
During Design / Before Creating Orders
While creating specifications, there are three things you can do that will prevent problems or minimize extra work during the ordering process:
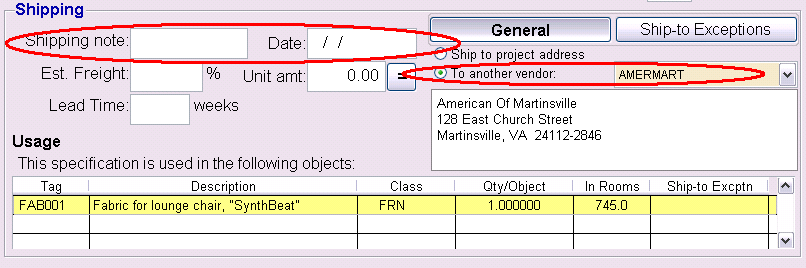
- If you wish to have a specific shipping note and date associated with an order item (not the entire order), you can enter it on the specification under "Shipping" (see image above). These two fields are meant to work together, so you can enter "Deliver by" in the "note" and enter a target date to go with it. Target dates can be used in queries. Leave these blank if you want to put a single note that applies to an entire order (after the order is created).
- If you know that a product will be shipped to a another vendor instead of the project site, you can select the alternate destination on the Specification screen. This is also accomplished under the "Shipping" section. Note: a "warehouse / consolidator" can be set up as a "vendor" for shipping purposes. However, if the majority of the items being ordered are first being staged at a warehouse, you may want to set this up as the shipping address on the project screen. You can override this on the Specifications screen for items that should go to another vendor.
- Best practices dictate that each order should reference one and only one shipping address. However, if you must create a single order for items that might be split and shipped to different addresses, you can create a dummy vendor that substitutes instructions to the vendor for a usable shipping address. See Working with Addresses.
- If you use an alternate shipping address, be sure to verify that the address that is displayed is complete. If not, edit the vendor used as the destination to complete the address. The Specification screen's "Spec Usage and Shipping Report" can be used to double-check addresses prior to creating orders.
If you know that an item will be shipped to an alternate address, set this up on the spec before you create orders from the resulting FF&E. FF&EZ will automatically group and create separate orders for any items that are not being shipped to the default project address. Although this can be corrected on the order, this is much more difficult if the items do not all ship to the same alternate address (it requires that you clone the order to a new one and remove items from each so the addresses can be set separately for the remaining items). This is not fun.
After Creating But Before Issuing Orders
After you have created orders but before you issue them, you can also do several actions that will make expediting easier:
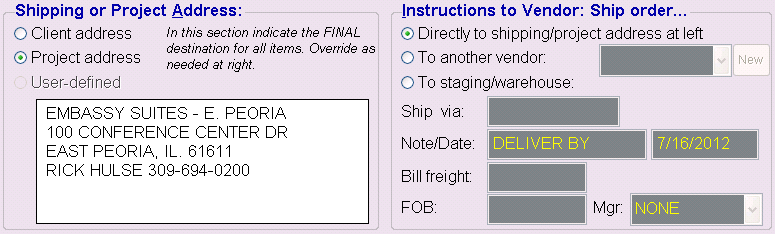
- Verify the shipping address and set an alternate address if needed. This is similar to what you can do on the specification, however you can also override the project address with a manually entered address. You can select a vendor as the destination like you can on the Specification screen, but you can also select a "Staging/warehouse" vendor from vendors that have been flagged for this purpose.
- The "Note/Date" field (see image above) applies to the entire order. It automatically contains the phrase "SEE ITEM NOTES" on orders that contain more than one item. You can replace this as you desire. Each purchase order item also has a "Note/Date" field that you can set by using the small Edit Item button next to the "Order Items" list (see image below).
Important: Don't add shipping notes to items unless the note discussed here (which appearas in the order header) clearly directs the vendor to review each item.
- If an order is large enough that you may wish to schedule shipments in phases, you can use the Split command on the Orders screen to split the order quantity into two or more lines that each have their own shipping note and date. Note, however, that you can split an item later, on the Expediting screen, to reflect actual quantities shipped. We recommend that you avoid splitting quantities before you issue a purchase order, unless it is a large phase and you are confident of the quantities that will be needed to satisfy both the project and the shipping procedures.
After An Order is Issued
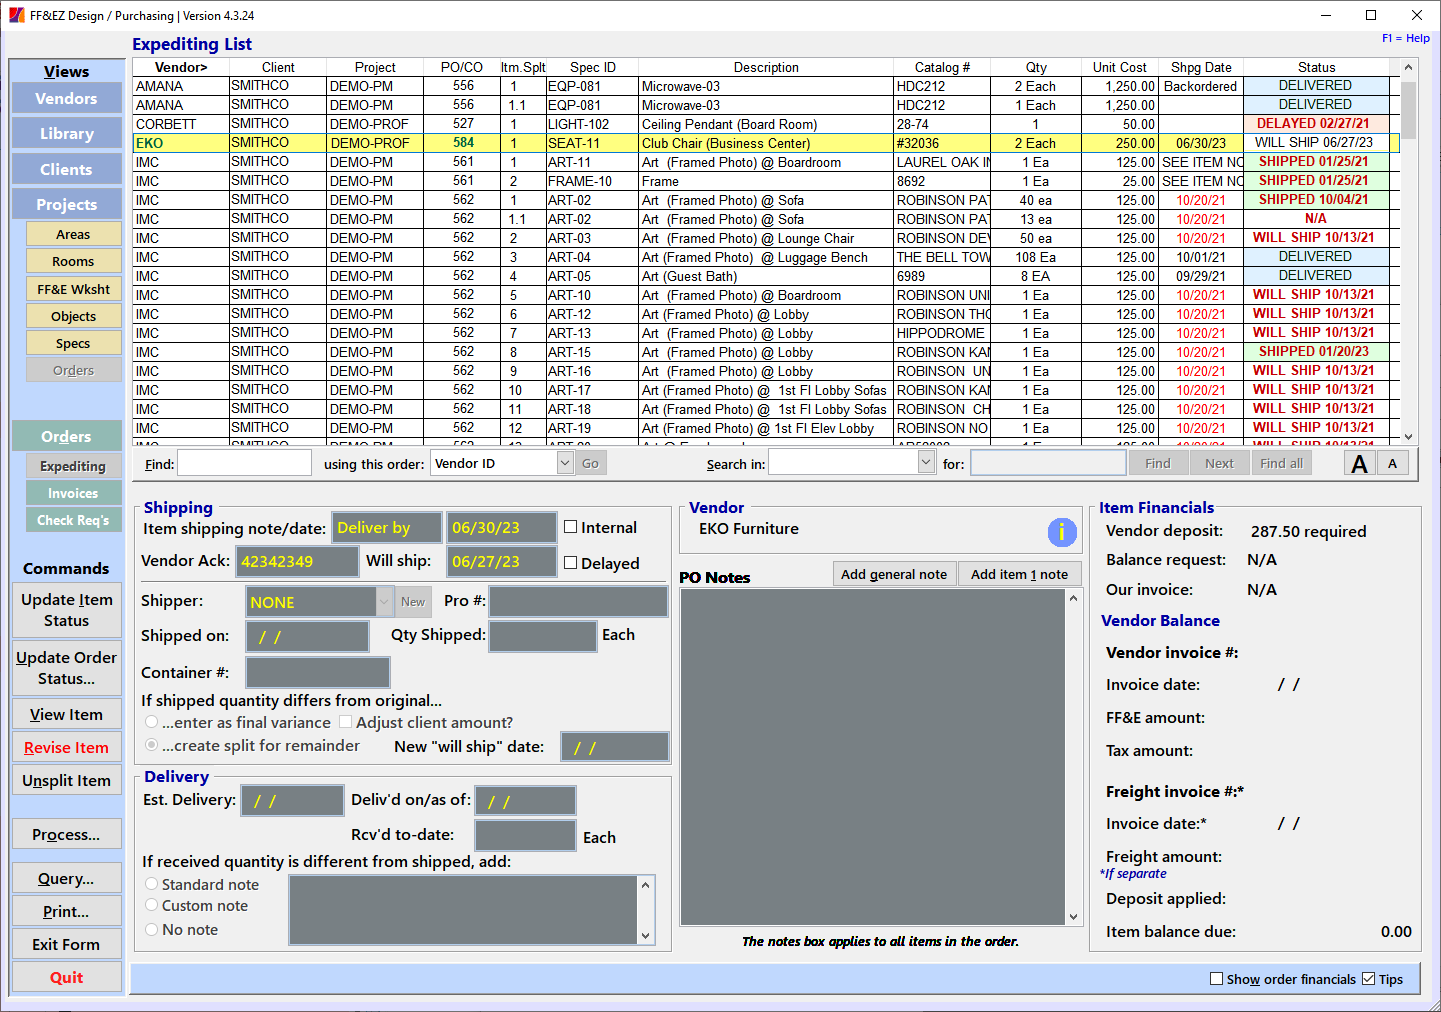
The Expediting Screen is used for most expediting activity. This separates into two major types of activity:
- Updating single items that need special attention, such as a shipping quantity difference or split, specific shipping schedule instructions or a specific "will ship" date from the vendor.
- Updating the entire order status when no quantity variance or other exception has occurred.
There are two main commands for updating the status. If you can update the entire order with a status update, you should use the Update Order Status command.
If an update only applies to one item, locate (highlight) that item and use the Update Item Status command. This functions like a status field Edit command for the item that is currently highlighted on the Expediting List (that means that double-clicking the data area will execute this command and open up the status fields for changes).
If you wish to review the details of an item without changing it, you can use the View Item command, while the Revise Item command can be used to change the original item details. Please note that some details cannot be changed once shipping activity has been recorded. In particular, you should not change the original quantity of an item to reflect an "actual" amount shipped. The system has a separate set of fields on the Expediting Screen which are used to track shipping and delivery quantities. Always use these.
Update Order Status Command
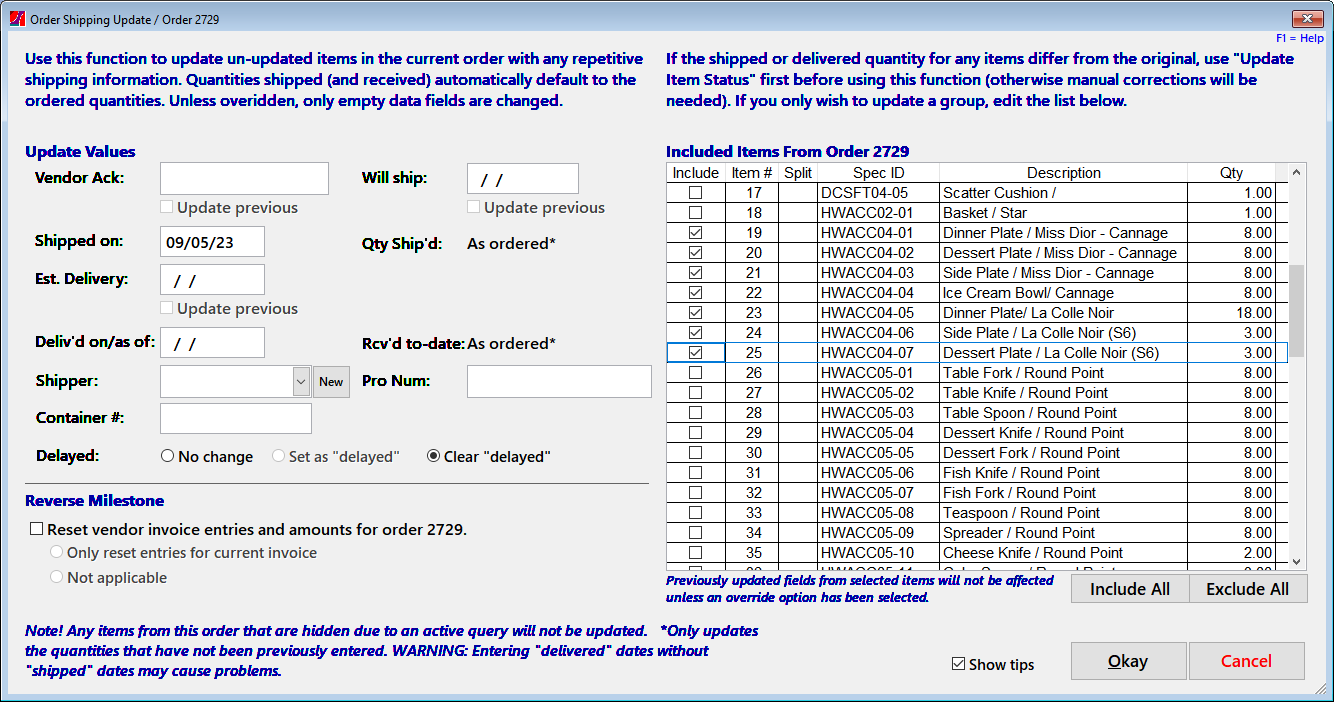
This command can be used to update any (or all) of the information listed below, for the entire order. Please note that it does not normally change any information that has already been updated on single items (with exceptions noted below). This means that you can use it to update an entire order or use it to update just the items that have not been previously updated. After using this command, you can still change individual items if a mistake was made or information changes later. The command only changes fields for which you supply a value.
|
Vendor Ack (Acknowledgement)
|
The code or ID from the vendor acknowledging receipt of the order. This appears on each item, but is normally entered for the entire order with this command. If you have previously entered a "placeholder" (such as a vendor representative's name) as a temporary acknowledgement, you have the option of overriding the previous entries.
|
|
"Will Ship" date
|
This is the date on which the vendor or shipper has promised to ship the order or order item. If existing promised date has changed for the whole order, you have the option of overriding previous entries.
|
|
"Shipped on" date
|
This is the actual date on which the shipment occurred. Note that you can also treat this date as the date on which you confirmed that the item shipped, if that fits better with your procedures or available data. You will need to be consistent about this or add a PO note as needed.
|
|
Qty Shipped
|
This is always the expected order quantity and is entered automatically if you use this command to update the "Shipped on" date. If the quantity is not the same as expected, use the Update Item Status command instead.
|
|
Est. Delivery
|
The date given by the vendor on which the items are expected to be delivered. You can update this more than once using the "Update previous" option—keep in mind that it overrides all entries for the order, so exceptions may need to be corrected individually.
|
|
"Delivered" date
|
This can also mean "Received" date. This is the date on which the order items were received (or the date on which receipt was confirmed, if desired).
|
|
Qty Received
|
This is always the quantity that is expected to be delivered and is entered automatically if you use this command to update the "Delivered" date. If the quantity is not the same as expected, use the Update Item Status command instead.
|
|
Shipper
|
The shipping vendor (shipping vendors are vendors in the Vendor List that have been flagged as a shipper).
|
|
Trkg/Pro Num
|
Any tracking number used by the shipper.
|
|
Container #
|
The ISO format container number. This field verifies the format and the check digit of your input.
|
|
Delayed
|
Use this to set or clear the "Delayed" status flag for all unshipped or undelivered items on the order. This can't be used if you are also entering a "shipped" or "delivered" date.
|
Update Item Status Command
This is basically an Edit command that can be used to update the status of a single item or item split on the purchase order. You can update any of the fields listed in the previous section. The primary purpose for this command is to handle orders in which the status of each item changes at different times and to handle changes to the expected quantities of each item.
When updating items, here are the differences for specific fields between the "update item" and the "update order" version above:
|
"Will Ship" date
|
The date on which the vendor has promised to ship a specific item.
|
|
Delayed
|
Use this if the current item has been delayed in some way and you wish to indicate this status on the screen and on "Expediting Status" reports.
|
|
"Shipped on" date
|
You must enter this date in order to activate the "Qty Shipped" field.
|
|
Qty Shipped
|
When a "Shipped on" date is entered, this field will automatically show the "expected" quantity. If you enter a different quantity, the software will expect you to choose one of the two options for dealing with the difference
- If the quantity is less because the shipment has been split into two or more shipments, select "...create a split for the remainder." Optional: If the shipper has given you a new "Will ship" date for the remaining quantity, you can enter it in the field. When you save your input, the system will create a new line item with the remaining quantity.
- If the quantity is a permanent variance because of a manufacturer's overrun, underrun or failure to perform, select that option instead. The difference will be recorded as a variance. If this is a "for-profit" project in which individual items are invoiced to your client, you can indicate whether this variance will affect the quantity to be billed.
|
|
Est. Delivery
|
The date given by the vendor on which the item is expected to be delivered.
|
|
"Delivered" date
|
You must enter this date in order to activate the "Rec'd to-date" field.
|
|
Rec'd to-date
|
If you enter a quantity that is different from the expected quantity, the software will offer to create an automatic note in the "PO Notes" field.
|
If you make an error in setting the "shipped" or "received" status fields, always change the fields in reverse order. For instance, if a shipment is short and you realize that only half was shipped, erase the "Qty Received" value (if entered), then the "Delivered" date, then change the "Qty Shipped" amount. This will create a split with the remainder, while you enter the correct quantity received in the original line.
PO Notes / Item Notes
Most users who are tracking purchase orders make extensive use of the PO Notes field to add details to their status updates. When you click on an Add Note button, the system will push existing notes down and add a new, dated note with your user name at the top of the notes. If you add a note for a highlighted item, the item number will be included.
Several reports on the Order Screen and the Expediting Screen have an option to include the notes in the report. This can make reports very long if you add extensive notes, so it may be more efficient to read notes from the screen.
Note: We strongly discourage using the "PO Notes" field when a specific field (like "Will ship" or "Pro #") is available to record status information. Not only does this "bury" that information in the note, it will not appear in the expected location on order status reports. Use the notes for supplemental information about status changes.
Expediting Status Report
This report is available on the Expediting Screen under Print. It gathers all of the expediting status fields into a single report. Like other Order and Expediting reports, it will default to the project denoted by the currently highlighted order or order item. There are multiple sort orders for different purposes.
|

