
FF&EZ's Clone and Import Commands: Turbocharging Project Creation
For someone delivering and supporting software, it is always a pleasure to answer the question "Can I do that?" with "Yes!" However, two FF&EZ commands, Clone and Import, are particularly fun to talk about because they often yield the most excited reactions from FF&EZ users. After all, imagine being able to piece together an entire design project's specifications in a few minutes using fully populated templates for specifications, objects (assemblies), entire rooms or even entire projects. This post discusses the two commands and their variants that allow you to do this with both repetitive and highly original building designs.
FF&EZ's primary purpose is to organize all of the pieces of a design project into a database that makes it much easier to manage changes. However, a direct result of users putting their data into an organized structure is that it also becomes easy to manipulate that structure in ways that may appear astonishing to those who have only used word-processing and spreadsheet documents. The Clone and Import commands make this particularly obvious.
These commands are actually a family of commands that work in the same basic way, but which have understandable differences that depend on the context of what you are cloning or importing. If you are unfamiliar with FF&EZ, this context is simply the primary screen that you are viewing (that is, specs vs. objects vs. rooms, etc.) when you select one of these commands. The commands are available on most of the major editing screens in the system (Vendors, Rooms, Specs, etc.), with the specific screens listed in the sections below. The major editing screens are:
Vendors
System Specification Library
Clients
Projects
Project Areas (contains rooms)
Project Rooms
Project Objects (finished items or assemblies—the contents of rooms)
Project Specifications (products to use in objects)
FF&E Worksheet (the sortable worksheet showing the objects and quantities in each room)
The Clone Command
Since another word for "clone" is "copy," that gives you the essence of what the command does. However, we use the word "clone" because "copy" implies that each resulting version is meant to be the same (like copying spreadsheet rows)—and if you are simply copying things, you may have missed the point!
In FF&EZ, as in biology, something that is cloned starts out the same but typically develops into a separate individual (with environmentally influenced personalities or, at least, hairstyles). Copying for the sake of simply having an identical copy is almost never done in FF&EZ, because one of its major advantages is to let you define something just one time, then simply point to it (e.g., each product specification for a particular manufacturer points to the same vendor record). The one exception might be cloning a project for a very standardized franchise design so the location could be changed.
Cloning is used to create a copy of something that you then intend to adapt for a different functional or design purpose. It is available on the following screens:
Vendors - Creates a copy of the vendor. A typical use would be to create a separate contact for the same manufacturer or supplier, or to create a historical record of a vendor's old address associated with an old project (that is, you would use the clone on new projects with a current address or contact).
Specification Library - Creates a copy of the library specification. You might use this to create a variation for a specific product (such as a different color). Note that the combination of Vendor ID and Catalog # must be different from the original item. This is similar to Project Specifications (below) but there is no Spec ID field in the Library.
Clients - A copy of a client record is rarely needed, but if you have a client big enough to have different people in charge of different projects, this makes it easy to set up.
Projects - The most powerful of the Clone commands creates a new project from an existing one. Since it copies everything in the project (except the vendors, which do not need to be duplicated), you can then edit the cloned project as needed to make it conform to the new requirements. This could be as simple as changing the room counts in a hotel project and printing reports, or you may be reworking an entire lobby while you keep other parts the same. A cloned project can also be used to create a "snapshot" of a project with a certain configuration (such as a lower-cost variation of the FF&E selections) so that two different budget levels can be presented.
Project Rooms - When you clone a room in a project, FF&EZ copies all the usages of the items in it. This results in a new room containing identical quantities of all the objects in the original—and all pointing to the same source objects in the Object List (not copies). So, changes to a source object will still appear in all rooms where you use it.
This can then become the starting point for creating a variation by adding, replacing or removing items (such as switching out one of two queen beds for a sleeper sofa). You don't normally clone a room unless you need a variation, since the "Room Quantity" on the Rooms List screen controls how many of the same room exist. This quantity should be adjusted as needed for the new room.
The Rooms screen also has a Clone Into command, which lets you copy a selection of the current room's FF&E objects into another room (that does not already have those items). This is useful in projects where you have created all the rooms in order to create a budget, but have not added objects into the rooms.
Project Objects - Cloning an object only makes sense for objects with more than one component specification (such as one that calls for a chair frame and a separate fabric). After cloning, the new object still points to the same specifications, so one would normally add, replace or remove at least one of them to make the object different (such as pointing to a different fabric).
Project Specifications - Just like cloning a library specification, you might clone a project specification to create a variation in color or finish to use in different parts of your project. If the specification is a generic one, you might also clone a specification as the starting point for a different pricing scheme.
")
Since the Clone command makes a copy of something, please note that the first step in using it is to select (highlight) the item you plan to clone. Whatever is highlighted at the time you click the button will be the source of the copy.
(Note: In the FF&EZ Design/Purchasing system, you can also clone existing orders and clone or import items within any order. Although cloning an item within an order (or using its more focused sibling, Split) might sound unusual, it allows you to set up staged delivery quantities and dates.)
The Import Command
The biggest difference between "cloning" and "importing" is that a clone is created from the highlighted item on the list you are currently viewing (e.g., cloning a room in a project to create a new room in the same project), whereas "importing" always means creating a copy of something from a source outside of the current list. This creates different flavors of the Import command that depend on the nature of the screen you are on. For instance, if you are working in an opened project the Import command on the Specifications Screen will copy a spec from another project and the one on the Rooms Screen will import an entire room from another project, including all the objects and product specifications used in it.
If you are on the Project List Screen, the Import command creates a new project by importing one from another FF&EZ system (in the form of an "FDA" file* exported from that system). Finally, if you are working on the Client, Vendor or Library screens, the Import List utility is used to import the entire list from another FF&EZ system, adding to or updating the list you are looking at. This last form of the import command is used less frequently, unless you regularly work with other firms or you are an independent representative working from a satellite location (where a "master" list is kept by the home office).
Importing is available on the following screens, with the specific forms shown below:
Vendors - The Import List utility appears as a separate command button. It will import the special FDA format exported from another FF&EZ system, and either update existing vendors (based on the Vendor ID match) or create those that do not exist yet. Note that when you import a project (see below), the FDA format includes any vendors that are needed for incoming data. FF&EZ will add them if they do not exist in the target system (based on the Vendor ID).
System Specification Library - The library has both types of this command. Add> Import allows you to update the library by importing a specification from a project. Alternatively, Import List is a separate utility command like that for vendors. It will import the special FDA format exported from another FF&EZ system, and either update existing library entries (based on the Vendor ID + Catalog # match) or create those that do not exist yet. This latter command is not used unless you work remotely for an office that maintains its own catalog of specific products to use.
Clients - Generally, this command is only used to initialize a remote system with a full list of your clients, using an FDA file exported from the home office. For single projects that are imported, the FDA file includes the client information.
Projects - The project screen's Import command is unique, in that it is used to import a project that has been created on another FF&EZ system (such as a remote salesperson or design firm working with a purchasing firm). Besides recreating the project contents, this command creates the client and any vendors that are missing on the target machine (but does not change existing vendors). The FDA file format includes all of this data.
Project Rooms - This command allows you to import an entire room, including all objects and their associated specifications, from another project. Where the Project screen's Clone command allows you to create a new project by duplicating another one, this accomplishes a similar but more fine-tuned result: A project built from any desired pieces of any other project, including projects created solely to hold prototype rooms. Note that this utility screens the incoming objects and specs for tags and spec IDs that already exist in the active project and allows you to deal with them.
Project Objects - Where the Specification screen's import command only imports a single spec and that for the Room screen imports a whole set of objects and specs, this command allows you to pull a single object and all of its specs from any other project. It screens the incoming specs for spec IDs that already exist in the active project and allows you to deal with them.
Project Specifications - This is the simplest and most common import command, allowing you to grab any specification from either the Library or any other project and copy it into your current one. Unlike other forms of the command, the Spec Screen's Import command can be used with both the Add and the Edit command (so you can replace a skeleton spec with a fully detailed one).
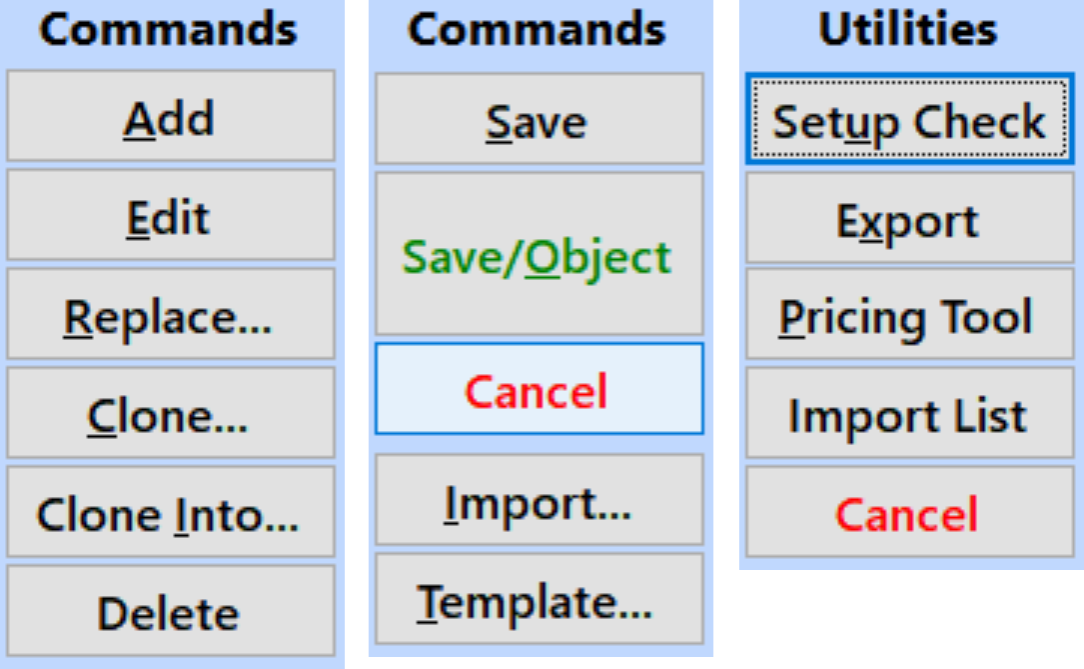
This command is supplemented by the more specialized Template import command, which appears next to it and allows you to quickly import any Library specification marked as a "prototype template" into a specification you are adding or editing. You can use this command to either replace blank fields in your spec with predefined entries and boilerplate, or simply append boilerplate text to your existing "Additional Description" entry (such as adding standard text for wear and flameproofing standards).
As implied in the image above, the Import command is part of the Add command's normal options. This means that in any situation where you are adding an object or a specification, you can use the import option instead of manually entering information. This construction of the command makes it that much easier to add predefined objects and specs "on the fly" as part of another procedure.
Importing an Entire Room
The Import command that appears when you are adding a room is a powerful tool if you take the time to set up your system for it, especially if you do work that involves a set of frequently used basic room types.
As we mentioned, you can import a room from any other project in the system. But in addition to previous projects, you can also set up a special project containing room prototypes based on the functional requirements of building types. The objects and specs in these prototype rooms would typically be "skeleton" entries waiting to be completed with the information for a real product. Or, one project might be filled with prototypes while another might be a fully-detailed "model" project for a client building franchise locations. This form of the command lets you easily resolve any conflicts (if any) between incoming Tags and Spec IDs and those that already exist in your project.
Although a "live" hotel project might have four to eight different types of guest rooms, a prototype project could have dozens, based on all the variations of content that you might encounter. These would be very easy to set up, because you can open your prototype project, clone an existing room and then make the changes needed to create the variation. You can use that variation in future live projects by importing it as a new room from within those projects. The prototype project can also contain unused objects that are ready to be placed in a new variation or simply imported into a live project.
Putting it all together
There are any number of instances in which you can use the Clone and Import commands: any situation where you might reuse all or part of an existing project. One way that will yield large benefits, though, is to organize a system of prototype rooms, either as part of a realistic prototype project or by using a "project" as a collection of many different prototypes. Prototypes can be rooms, objects (with specs already attached) or just specs with certain boilerplate information already entered. Then:
- Develop a system of generic object tags and corresponding spec IDs that make a good starting point for a live project. (Need more info about objects vs. specs? See the Help System entry "Introduction" then "Objects and their specifications")
- Create a prototype project to contain rooms and objects that are common to many (or all) of your projects. Keep in mind that these specs are normally meant to be generic or "skeleton" specs. Since you are building a list of what goes in a room, we highly recommend that you use the "Worksheet-oriented" method to create the objects and specs "on the fly" with minimal effort (in the Help System entry under Design Module> How to...> Worksheet-oriented Data Entry).
- You can also create a project that contains fully detailed specifications for a client's brand operations. Hint: If you have already done a project for a franchising type client, you can use the Room Import command to build the prototype! This is especially true if only one part of the project is standardized (hotel guest rooms vs. unique lobbies).
- Create prototype rooms using those objects. In building types that use a high percentage of repeating room types, concentrate on creating a list of typical objects in each room type.
- Use the Clone command to duplicate "base" rooms and then add or remove objects to create variations (e.g., clone a hotel room for a king-size bed to create variations with queen beds).
- In all cases where you expect the same objects to be used (e.g., carpet and pad, wall vinyl), use the same objects in all your room variations so that the imported rooms point to the same objects and specs, saving editing time. Since FF&EZ allows you to switch out or redefine objects and specs in a live project, this simply gives you a known, well-organized starting point that reflects the most likely arrangement in a real project.
- If you anticipate using more than one color scheme, clone the entire set of initial prototype rooms, then switch out color-related objects with a new set (different tags and specs only where needed) to create an alternate or second color scheme prototype (however, see the next note).
- Don't go overboard with exceptions to a base set of objects in a room—in other words, use these prototypes as starting points. Once you have imported them into a live project, you can create and add more unique objects that meet the live project's requirements and clone those rooms as starting points for project-specific variations.
- If you plant to build a live project using the Room Screen's Import command, always do it at the beginning of the project, to help avoid resolving too many conflicts between existing tags and spec IDs in the live project.
If you are importing rooms built from "skeletal" prototype specifications, you can later detail them with manual entries on the Specification Screen. However, you can also fill them out by using that screen's Import command after you click Edit. Mix and match as needed.
Cloning and importing are two of FF&EZ's most powerful tools for building projects without recreating large amounts of data. They are possible because of FF&EZ's database structure, and the more you use them, the more likely it will be that your project delivery time will shrink. Call us if you would like to learn more about them.